Pot
Chiclets - Spectrol 148/149, 248/249 and Bourns Type 91
potentiometer DIY aid
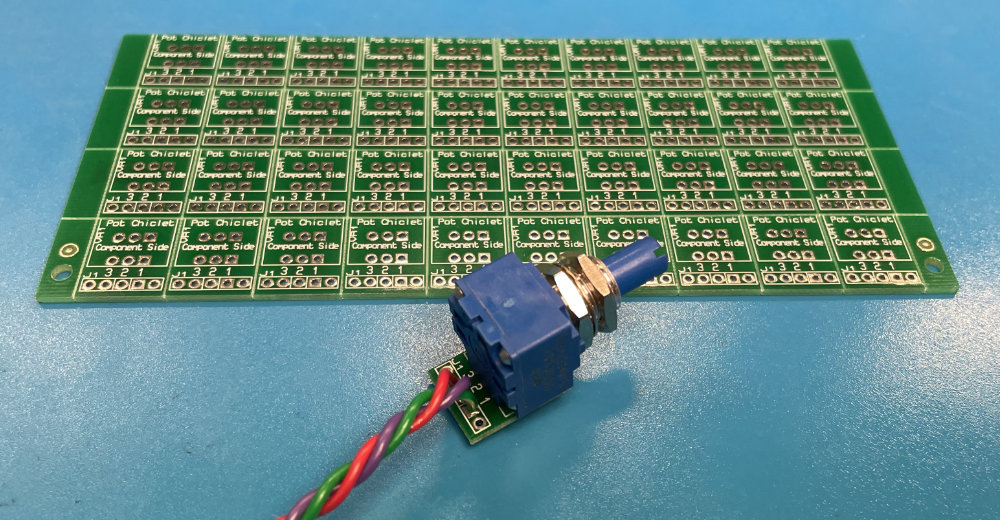
Pot Chiclets are small printed circuit boards to aid assembly of MOTM format kits with Spectrol 148/149 or 248/249, Bourns Type 91 potentiometers and other 3 pin 0.1" spaced PCB mount pots.
No more painstaking and time consuming J lead preparation and heat shrink is required! Free standing Spectrol pots without PC board mounting pad locations typically require bending and forming the pins into J leads, doing the same to the wires to be attached, hooking the two J leads then soldering each pin/wire together, hoping you didn't forget to add heatshrink over the wire before soldering. With Pot Chiclets, simply solder your potentiometer to the PC board, then solder wires to the PC board. You're done! Boards are professionally manufactured, silk screened, double sided copper with plated through holes and solder mask.
Applications:
- MOTM/Bridechamber/Synthcube 2U module kits
with a second row of Spectrol (black) pots. Some 2U MOTM
kits use a Bourns (blue) pot with solder tabs. Pot
Chiclets are not necessary for those kits, but can be used
with Bourns pots with PC terminals.
- CGS PCB conversions to MOTM format with
Spectrol or Bournes PC terminal pots. All pot connections
can use Pot Chiclets to simplify construction.
- Blacet kit conversions to MOTM format. All
pot connections can use Pot Chiclets to speed up
construction.
- Other PCB, DIY, kits and conversions using
Spectrol 148/149 or 248/249 or Bournes Type 91 pots, such
as Tellun Labs, Music from Outer Space, Oakley and others.
Almost any Bride Chamber panel based project can benefit
from Pot Chiclets.
- Pot Chiclets are
fully compatible with Bourns Type 91 PC Terminal
Potentiometers. See the photo below. Pads are located
in the center of the board to perfectly match Bourns
Type 91 PC terminal Pots.
- Most other pots with 3 pin 0.1 inch spacing PCB mount pins will
work with Pot Chiclets as well.
- Since there is one Pot Chiclet per pot, any
pot panel spacing or density is supported.
Installation
Notes:
- While 248/249 pots are installable on Pot
Chiclets, the smaller 248/249 base
gives the pot a cantilever action with the PC board. Also,
248/249 pots have a different feel than 148/149 pots, not
as smooth as standard MOTM pots. It is highly recommended
to use 148/149 pots as the
cost is not much higher than the 248/249 versions. The
148/149 have a sufficiently long base that a very secure
platform is created with the PC board, more secure than
wires soldered directly to PCB pins.
- Soldering is similar to MOTM kits. Install
the potentiometer to the Pot Chiclet before assembling the
pot to the panel. The Pot should be flush to the PC board,
in the VR1 position. The easiest way to do this is to
solder pin 1 first, then hold the PCB and pot together and
heat the pad again, forcing any gaps away. Make sure you
don't accidentally solder the pot into the J1 position.
Then solder the other two pins. Mount to Pot/PCB assembly
to the panel, and solder the wires to the provided J1
position.
- You can optionally add 3 pin 0.1 inch spaced
headers instead of wire connections, but this is not
necessary and actually less reliable over time than direct
soldered connections. It also increases your assembly
time.
- Pin numbering 1, 2 and 3 match
MOTM PC board pot/wire pin numbering.
- Extra pads are included for pins 1 and 3 to
allow easy daisy chaining of connections from pot to
pot. For instance, ground or power connections may not
always be provided to each and every pot from DIY PC
boards. Just use the extra pad for daisy chaining of
wire conecctions.
- J1 holes are large enough to accept standard
hookup wire - 22 AWG tinned wire leads.
- Pot Chiclets have plated through holes for
easy soldering from either side of the PCB. The solder
will flow into the hole so the soldered pins and wires
are more secure.
- If applying a lot of force to bend wire
soldered to the Pot Chiclet, be
sure to hold the PC Board and pot together so the two are
not separated. It is best to secure pot wires collectively
with tie wraps for support.
- Pin 2 is the center tap lead. As the pot is
moved in a clockwise direction, the tap value moves from
zero ohms between leads 1 and 2 and maximum resistance
between leads 2 and 3 (knob at "0") to zero ohms between 2
and 3 and maximum resistance between leads 1 and 2 (knob
at "10"). In standard pot terminology, clockwise knob
direction moves the pot from pin 1 to pin 3. Typical
connections are ground or -VCC for pin 1, summing node op
amp input for pin 2, and Jack input or +VCC for pin 3.
However, if the inverting function of an op amp is being
used, the connections can possibly be reversed for +/- VCC
connections.
- Questions? Email: John Loffink.
Prices:
50 cents each (US $0.50), plus the following
shipping & handling (S&H) charges per order. Price and S&H charges based upon payment
through PayPal only. Send payment to PayPal account jloffink@gmail.com
. Shipping prices updated February 2021.Pot Chiclets fully support Bourns Type 91, Alpha 9mm RD901F and BTI pots in addition to Spectrol pots. Pot Chiclets also have extra pads for pins 1 and 3 for daisy chained connections. All holes are plated through for easy and secure soldering from either side.
Board top and bottom views , next to a Bourns Type 91 potentiometer
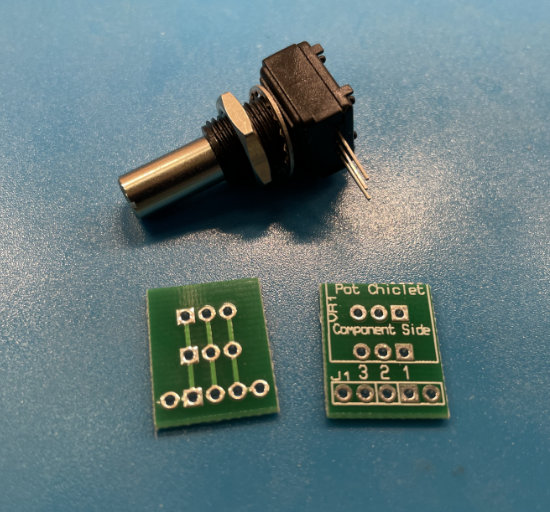
Board top and bottom views, next to a Spectrol 249 potentiometer
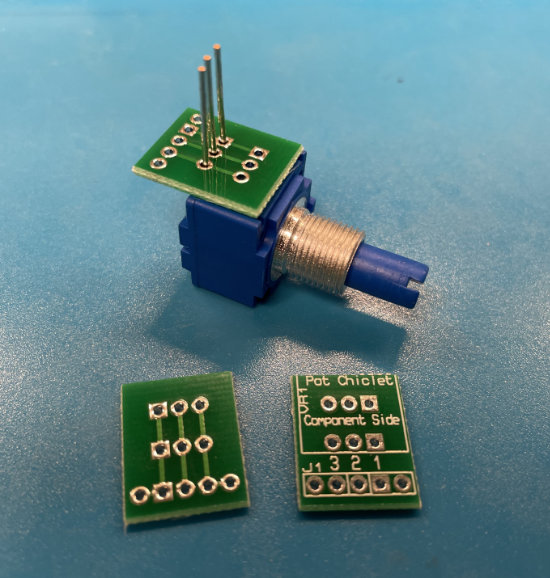
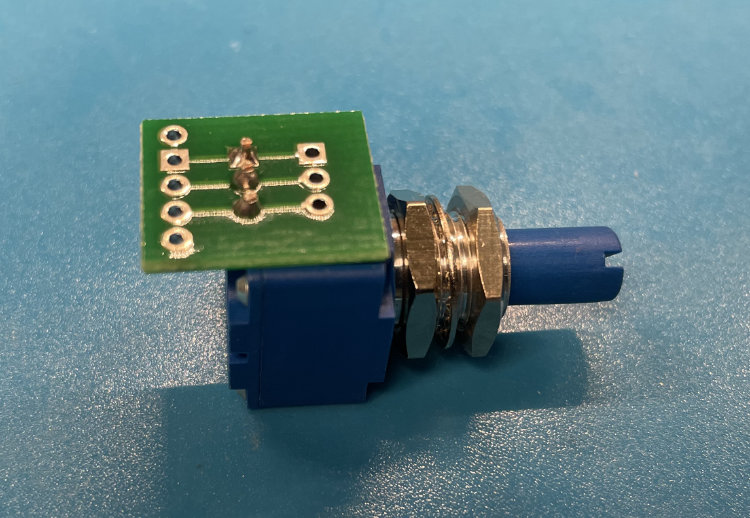
A
single Pot Chiclet soldered to the Bourns potentiometer,
Bottom View.
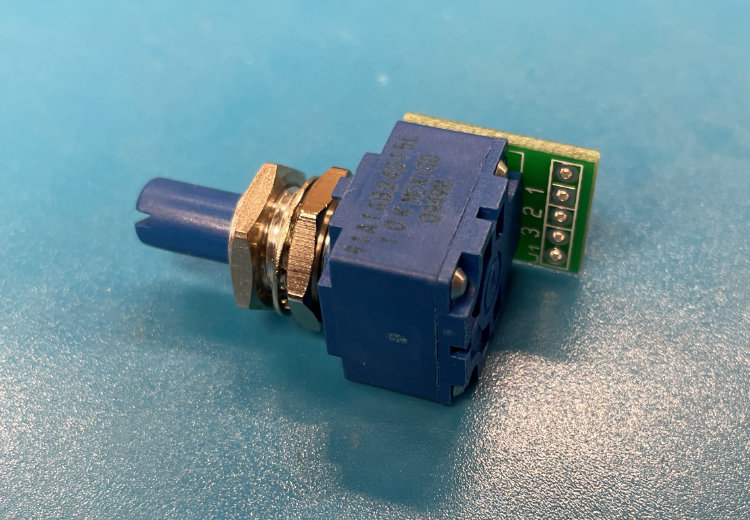
A
single Pot Chiclet with Bourns Potentiometer, Top View.
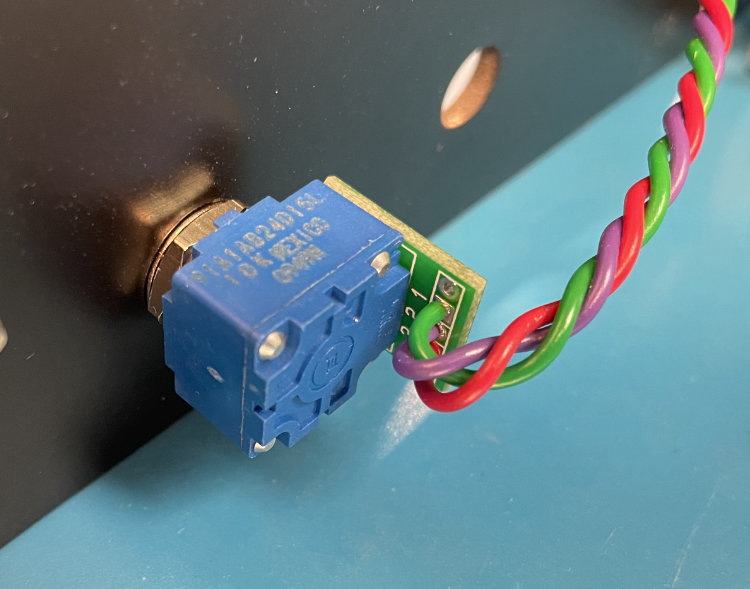
A
closeup of a Spectrol potentiometer and Pot Chiclet assembled
on a MOTM panel.